Container Image Security Part 2: Building & The pipeline

Detecting vulnerabilities in your container images from the container registry is a good start but, what if we want to implement a more proactive approach? Ideally, we ensure that known vulnerabilities don't even end up in the registry at all and are detected during our build and release processes.
When I started to write this blog post I realized there are a number of ways we can achieve this and, that number is very high. In this post we will focus on leveraging GitHub actions and we will use the Trivy GitHub Action as provided by Aqua.
The story
What we want is to inform our (Developer) colleagues of vulnerabilities residing in our container images. When we want to do that for existing images stored in our registry, we already can by leveraging features such as Microsoft Defender for Cloud as we discussed here. However, we can already mitigate a number of vulnerabilities earlier in the process by implementing container image scanning in our build and release pipelines, essentially shortening our feedback loop.
As I mentioned there are a number of ways to do this, even within GitHub we have different strategies we can implement. Which one is best for you depends on your build and release processes, your branching strategy and most importantly: what your colleagues feel most comfortable with.
The Options
We are going to leverage GitHub Actions. But when do we want to perform our vulnerability checks and for what? Let's first look at the when.
We can trigger an action to run when we push to a specific branch, or more general: whenever we push. Additionally, we can initiate a GitHub action when a Pull Request to a specific branch is done or if we're feeling adventurous, we can even schedule a recurring run. It all depends on your branching strategy. In our example we will be focusing on all Pull Requests into our main branch.
As for the "What". We will look for Operating System vulnerabilities and vulnerabilities for the packages used in our solution.
Alternatively, GitHub Environments provide additional flexibility and give you more control and differentiation. For example, you can have a Production and Development environment with their own set of variables and secrets and the GitHub workflows allow you to tap into that differentiation. That is not for this blog post, for the sake of simplicity, we are focusing specifically on scanning the container image and pushing it to our Azure Container Registry.
Configuration and Deployment
As the first step we will use the out of the box Trivy GitHub Action and store that in our main branch.
Note: GitHub workflows go inside the .github/workflows directory.
name: trivy

on:
  pull_request:
    branches: [ "main" ]
  schedule:
    - cron: '24 6 * * 1'

permissions:
  contents: read

jobs:
  build:
    permissions:
      contents: read # for actions/checkout to fetch code
      security-events: write # for github/codeql-action/upload-sarif to upload SARIF results
      actions: read # only required for a private repository by github/codeql-action/upload-sarif to get the Action run status
    name: Build
    runs-on: "ubuntu-20.04"
    steps:
      - name: Checkout code
        uses: actions/checkout@v3

      - name: Build an image from Dockerfile
        run: |
          docker build -t docker.io/my-organization/my-app:${{ github.sha }} .

      - name: Run Trivy vulnerability scanner
        uses: aquasecurity/trivy-action@master
        with:
          image-ref: 'docker.io/my-organization/my-app:${{ github.sha }}'
          format: 'table'
          exit-code: '1'
          ignore-unfixed: true
          vuln-type: 'os,library'
          severity: 'CRITICAL,HIGH'
A couple things to point out here:
- We are using exit-code: '1' to make sure our action fails when vulnerabilities are detected. That gives us options for further automation in blocking the Pull Request.
- The format is set to 'table' as this allows us to directly inspect the failed action and see the vulnerabilities that are detected.
- We run this workflow when a Pull Request against our main branch is initiated.
- Adjust any naming, image tags and formatting to your liking.
In our main branch we also have an action to push our successful image to Azure Container Registry. Which looks like this:
on:
  push:
    branches:
     - main
name: Build and push to ACR

jobs:
    build-and-deploy:
        runs-on: ubuntu-latest
        steps:
        # checkout the repo
        - name: 'Checkout GitHub Action'
          uses: actions/checkout@main

        - name: 'Login via Azure CLI'
          uses: azure/login@v1
          with:
            creds: ${{ secrets.AZURE_CREDENTIALS }}

        - name: 'Build and push image'
          uses: azure/docker-login@v1
          with:
            login-server: ${{ secrets.REGISTRY_LOGIN_SERVER }}
            username: ${{ secrets.REGISTRY_USERNAME }}
            password: ${{ secrets.REGISTRY_PASSWORD }}
        - run: |
            docker build . -t ${{ secrets.REGISTRY_LOGIN_SERVER }}/sampleapp:${{ github.sha }}
            docker push ${{ secrets.REGISTRY_LOGIN_SERVER }}/sampleapp:${{ github.sha }}
A step by step guide on how to configure the secrets and set up Azure Container Registry permissions can be found: Here.
Once we have this configured and push to our branch, let's see if we can create a pull request with commits containing the vulnerable container configuration we used in part one of this series.
By doing so, the Trivy workflow kicks off and we can see the results in our Pull Request:
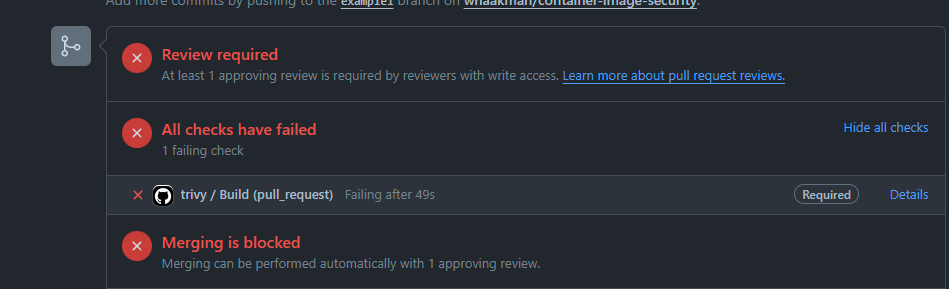
It failed, but why? But click on the Details link we are redirected to the failed step in our GitHub workflow and we can see it detected multiple vulnerabilities which resulted in a fail.
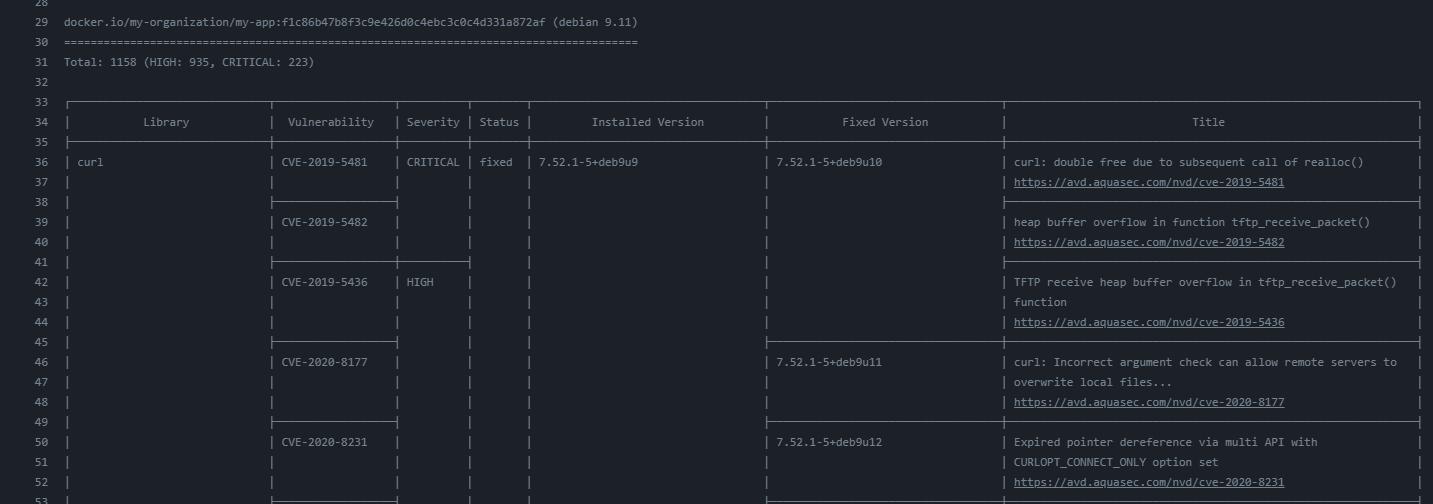
That's quite some vulnerabilities! Something we need to fix.
Now let's try that with a Pull Request that does not contain commits with so many vulnerabilities.
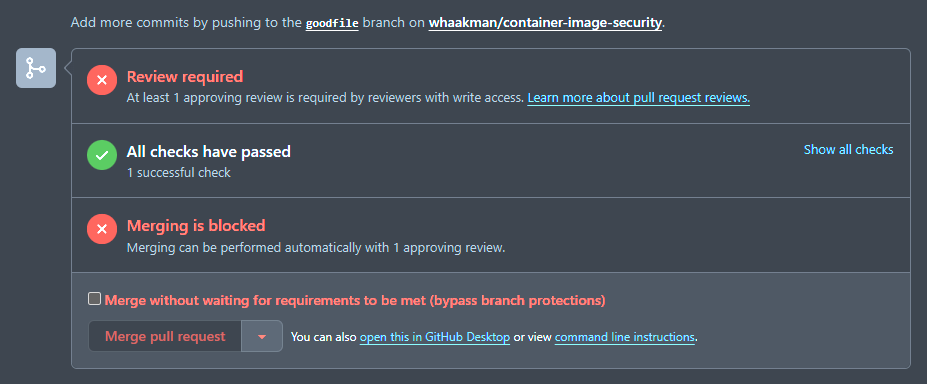
Success! We just need a reviewer to finalize our Pull Request and merge but for now we'll do this our self (don't do this in your production practice 😄).
What happens next is that we merge our Pull Request which will start our workflow to push the image to Azure Container Registry.
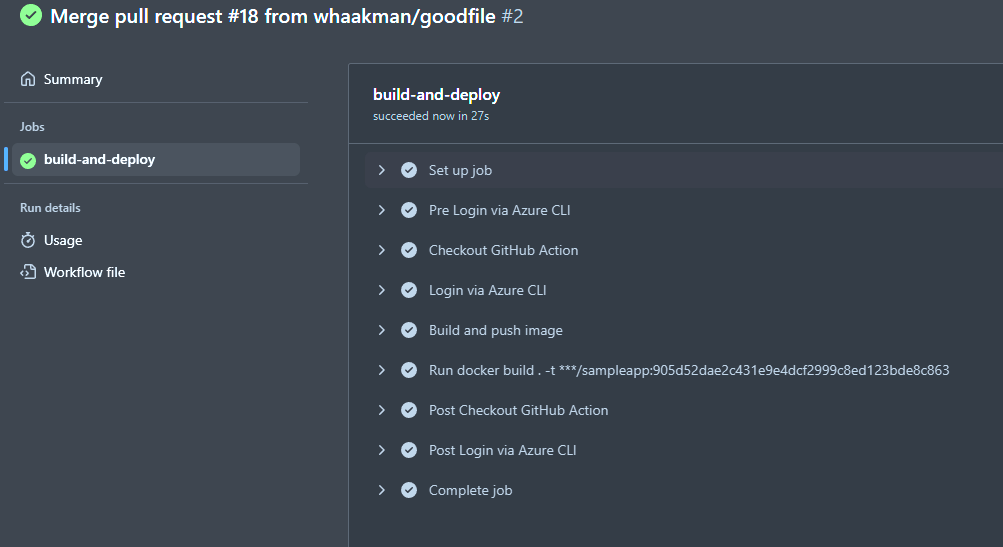
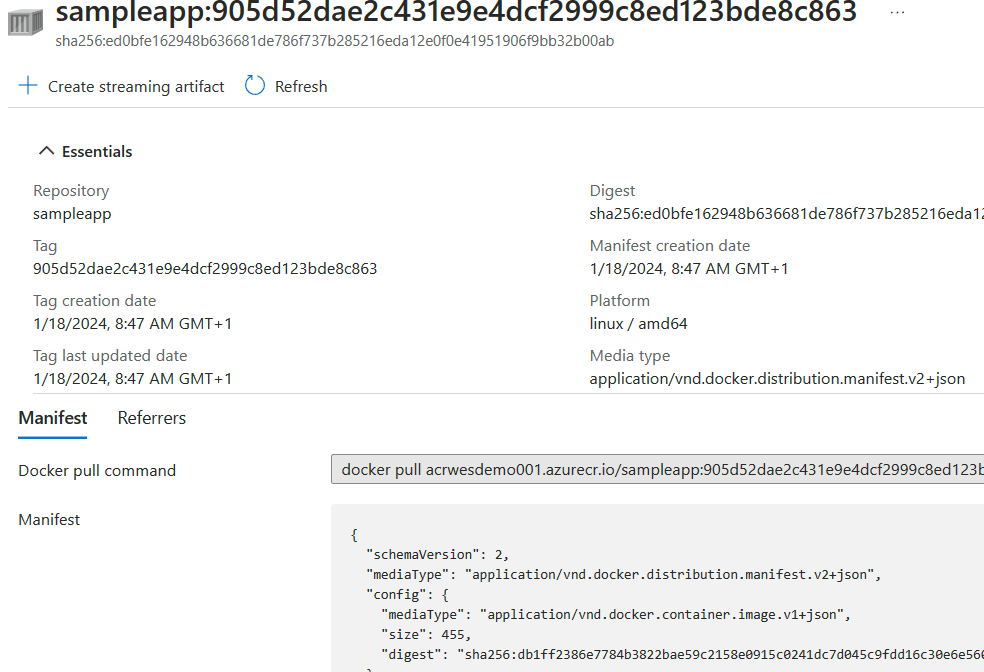
Again, success! Upon inspecting our Azure Container Registry (that has the Microsoft Defender for Cloud features enabled), we can see our sampleapp is now available through our registry:
Using GitHub Code Scanning
Alternatively, we can leverage GitHub Code scanning and store the results inside the Security tab of our repository. This works best if you are leveraging GitHub Environments and have different environments set up for your main branch as the reporting by default happens on the main branch.
If you want to go this route, make sure your action looks like this (as documented here very well).
- name: Run Trivy vulnerability scanner
uses: aquasecurity/trivy-action@master
with:
image-ref: 'docker.io/my-organization/my-app:${{ github.sha }}'
format: 'sarif'
output: 'trivy-results.sarif'
- name: Upload Trivy scan results to GitHub Security tab
uses: github/codeql-action/upload-sarif@v2
with:
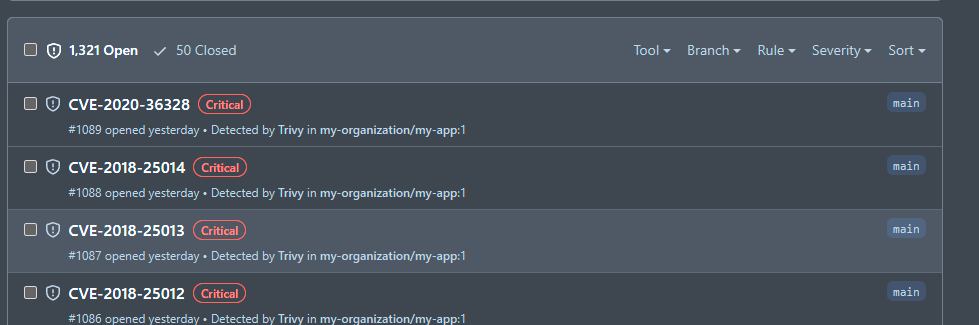
sarif_file: 'trivy-results.sarif'Your results will look similar to this:
Wrapping up
When writing this I found that there are more options out there than that I can fit in a single post. The most important part here is your strategy for development and deployment. Maybe we want to build and push the image during different steps in our process or maybe we're short on build minutes/capacity and go a completely different route. That is all perfectly fine, as long as we implement container image scanning.
We have seen we can use GitHub Actions to perform image scanning and shorten the feedback loop to mitigate known vulnerabilities. But as we have learned from the previous article, this is just one step and should not be your single solution for protecting your container images. We want to tie everything together. The why and how? we will know in a couple of posts from now!