Scaling Azure Functions from zero to (n) hero on Kubernetes with KEDA
Yes from zero to hero because that's what it felt like when I first set up KEDA and started scaling some Azure Functions on Kubernetes. There are multiple write-ups on this subject but I wanted to learn and start from scratch. I didn't just want to scale, I wanted to process something. I was surprised how easy it was to set up KEDA. I spend more time writing the Azure Function and configuring all the other moving parts.
Table of Contents
Requirements
Solution Components
Setup and Configuration
Building the Azure Function
Creating the Docker Image
Creating the YAML file for AKS
Result
If you're not looking for the write-up and just want to get started with the code, you can find it here.
The Requirements
To gain more knowledge on how KEDA (Kubernetes Event-driven Autoscaling) operates I was looking for a good demo to build myself and of course show others :)
I wanted to build the whole thing by myself and had the following requirements
- Host an Azure Function in Azure Kubernetes Service
- Have a default of 0 deployments and scale to however many I would need to get the job done as fast as possible
- Use an Azure Function that picks up messages from an Azure Storage queue
- Get the contents of the messages and store them as a txt file in Azure Storage blobs
Sounds easy enough! ahem..
The Solution Components
The infrastructure requires the following components:
- Azure Kubernetes Cluster
- KEDA 2.0 installed on the Kubernetes Cluster
- Azure Container Registry
- Azure Function to process the queue messages
- Dockerfile with the correct configuration and environment variables to build and run the function.
- Required secrets in AKS for the Pods parse when starting the container
Setting up the environment
For the infrastructure parts we need to set up Azure Kubernetes services, a storage account and configure the required secrets.
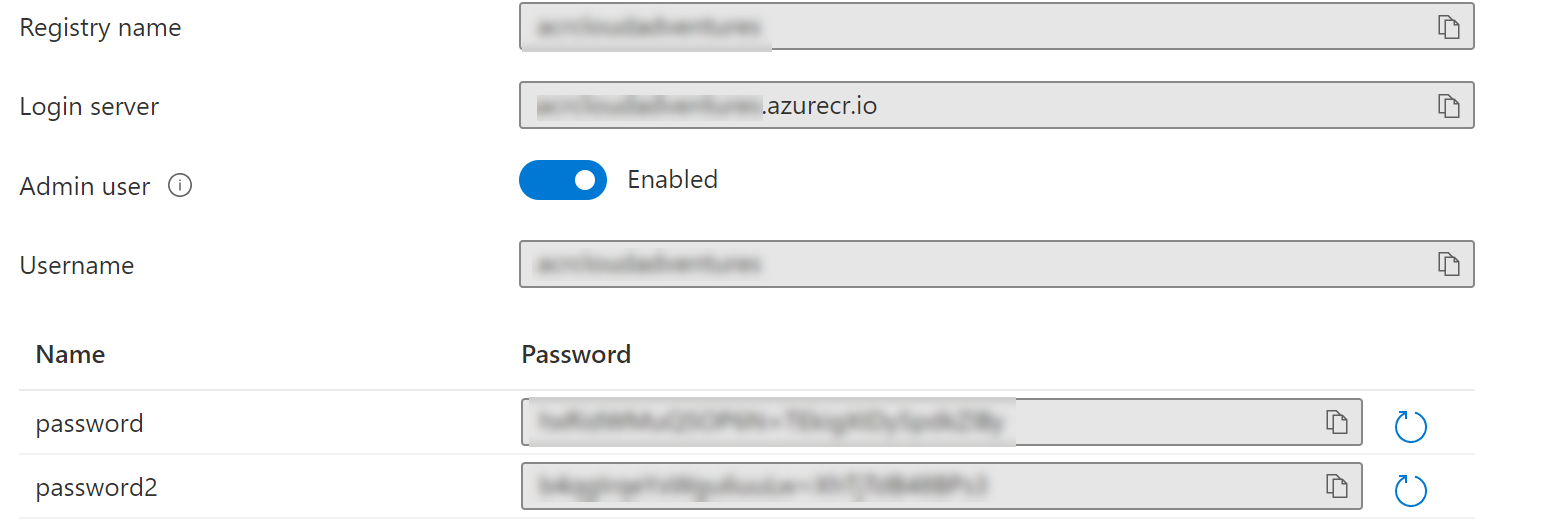
Azure Container Registry
Create an Azure Container Registry (walkthrough here) and note down the logins credentials (enable admin password).
Azure Kubernetes Service (AKS)
For installing AKS I recommend the Microsoft Docs. You can use the following link (here) for an Azure CLI example or (here) for a tutorial to deploy AKS through the Azure Portal. You can deploy the sample application as provided in the walkthrough to test if your cluster is functioning but it's not a required for getting this solution to run.
Storage account and AKS Secrets
Deploy a new storage account and create a queue. You can create a queue using the following documentation (here). The function will be triggered based on messages in this queue. Note the queue name down because you need this later.
Next grab the storage account connection string and note it down (paste is somewhere you can find it).
Once you have the storage account we're going to create a secret in AKS that we can reference in our deployment definition later on to provide the container (and thus the function) with the correct connection string. We'll create the secret as follows:
kubectl create secret generic storageaccountconnectiostring --from-literal=storageAccountConnectionString='<Storage Account Connection String>'
This will result in the following messages being displayed "secret/storageconnectionstring created".
Image Pull Secret
We also need to create the ImagePullSecret for AKS to grab the container image from the Azure Container Registry.
kubectl create secret docker-registry containerregistrysecret `
         --docker-server="**containerRegistryName**.azurecr.io" `
         --docker-username="**containerRegistryName**" `
         --docker-password="**containerRegistryPassword**"
Deploying KEDA 2.0
Deploying KEDA works best through Helm. It's described in detail int he KEDA docs (here).
helm repo add kedacore https://kedacore.github.io/charts
helm repo update
kubectl create namespace keda
helm install keda kedacore/keda --namespace keda
Building the Azure Function
To set up the Azure Function we need Visual Studio Code and the Azure Function Core Tools.
Now it's time to create the function and deploy the code. Create a directory with the name of your function (QueueProcessorDocker in my case) and run the following command:
func init --worker-runtime dotnet --docker
This will create the required Dockerfile for our function. Now we can create the function using the following command. We're also adding the Azure.Storage.Blobs package because we need this to create our blob client.
func new
dotnet add package Azure.Storage.Blobs
Upon creating the function you will be asked a couple of questions. I went with the following configuration:
Language: C#
Template: Queue Trigger
Once the function is done. Start Visual Code and open the directory:
code .
Alright. Let's create the code. It's not too big and does the job. We're not looking for a complex function with all features anyone could ever wish for. Instead, we want to see how we can scale with KEDA :)
In the following code (this goes inside your Public static class) we're basically doing a couple of things.
The Function is triggered when a message is stored in the queue. This trigger passes the message to the function as "myQueueItem". That means we already got that part going for us.
Please note you have to configure the name of your queue here (QueueTrigger("messagesfromjjbinks"). If you followed along you have it noted down somewhere :)
  [FunctionName("QueueProcessor")]
        public static void Run([QueueTrigger("messagesfromjjbinks", Connection = "storageAccountConnectionString")]string myQueueItem, ILogger log)
        {
We're also declaring the connection string for the storage account that is used to connect to the storage account where we store the blob storage. Yes twice. The connection string is also passed in the Queue trigger but what if you want to use a different storage account to store your blobs?
  // Connection string for the Storage Account that we use to store the files
            string connectionString = Environment.GetEnvironmentVariable("storageAccountConnectionString");
            string storageContainerName = Environment.GetEnvironmentVariable("storageContainerName");
We then create blob client and use the connectionString. Additionally we're calling the .CreateifNotExists() method to create the blob container if it doesn't exist. That means if you want to clean up you can just throw it away.
// Create the blob client
            var blobServiceClient = new BlobServiceClient(connectionString);
            var blobContainerClient = blobServiceClient.GetBlobContainerClient(storageContainerName);

            // Create the container if it doesn't exist (this means you can throw it away after your test :) )
            blobContainerClient.CreateIfNotExists();
            var blobName = Guid.NewGuid().ToString() + ".txt";
Next we want to store the contents of the myQueueItem in a text file in the blob storage container. We don't want to output to a local file within the function first so we'll grab the stream from memory and then store in in blob storage. We use MemoryStream for that.
            // Create a stream from the queue item and store it in the blob container (as txt))
            byte[] byteArray = Encoding.UTF8.GetBytes(myQueueItem);
            MemoryStream stream = new MemoryStream(byteArray);

            blobContainerClient.UploadBlob(blobName, stream);
Creating the Docker image
Now that we have the function set up let's take at building the container. When the function was initiated, a Dockerfile was generated specific to your function. That means all we need to do is build the image and push it.
Don't forget to run docker login before you push and enter the credentials of the Azure Container Registry.
docker build -t queueprocessor:v1 .
docker tag queueprocessor:v1 ACRNAME.azurecr.io/queueprocessor:v1
docker push docker tag queueprocessor:v1 ACRNAME.azurecr.io/queueprocessor:v1
Optionally if you want to test locally you can run the image as follows:
docker run -e storageAccountConnectionString="<CONNECTIONSTRING>" -e storageContainerName="<BLOBSTORAGECONTAINERNAME>" queueprocessor:v1
After running the docker container locally you should be able to see queue messages being processed and stored as a .txt file in the designated blob container.
Creating the YAML file for AKS
We don't have to create the YAML file manually. The Azure Function Core tools provide an option to do just that for you. We're going to do a "dry run" to generate the YAML. You could deploy it directly without the "--dry-run" parameter but we do want to make some additions to the file. You can generate the file as follows:
func kubernetes deploy --name function-queue-processing `
--image-name "acrcloudadventures.azurecr.io/queueprocessor:v1" `
--dry-run > deploy.yaml
This will generate a reasonably sized YAML file. We're not going through the file line by line. Let's look at the parts we need to change for our Azure Function to work in combination with KEDA.
First we need to update the secret. Find the secret at the top of the file. The "AzureWebJobStorage" is already populated with a string in Base64, you can leave that as is. We do need to make sure we have a secret set up that the KEDA ScaledObject can use to communicate with the Azure Queue (and determine if it needs to scale). Grab your Storage Account connection string (the one where your queue is living in) and encode it as Base64 (for example through https://www.base64encode.org/).
data:
  AzureWebJobsStorage: <CONNECTION STRING IN BASE64>
  **STORAGE_CONNECTIONSTRING_ENV_NAME: <CONNECTION STRING IN BASE64>**
  FUNCTIONS_WORKER_RUNTIME: ZG90bmV0
apiVersion: v1
kind: Secret
metadata:
  name: function-queue-processing
  namespace: default
As a next step we want to update the deployment to contain the right environment variables and the ImagePullSecret. I've made the following changes:
- Image location and name (we pushed that to the container registry earlier)
- Storage Account Connection String for the blob storage to pass to the container
- Storage Account Container Name for the blob storage
- imagePullSecrets (secret we created earlier to connect to the Azure Container Registry)
   spec:
      containers:
      - name: function-queue-processing
        **image: <REGISTRY/queueprocessor:v1>** # Address of your registry + image
        env:
        - name: AzureFunctionsJobHost__functions__0
          value: QueueProcessor
        **- name: storageAccountConnectionString
          valueFrom:
           secretKeyRef:
            name: storageconnectionstring
            key: storageAccountConnectionString**
        **- name: storageContainerName
          value: "messagesfromjjbinks"**
        envFrom:
        - secretRef:
            name: function-queue-processing
      **imagePullSecrets:
       - name: containerregistrysecret**
Next we need to set up the ScaledObject. It's already provided by default when generating the YAML but we want to make some additions. If you're looking for documentation on ScaledObjects please check here.
Let's look at some important details.
"scaleTargetRef": This needs to correspond with your deployment. Basically you're saying "Dear KEDA, when you need to scale, do it for this deployment".
"queueName": This needs to correspond with the name of the queue that KEDA will look at. In this example we're using the same queue as we are storing our messages for the Azure Function to process.
"connectionFromEnv": This refers to the Base64 connection string as stored at the start of the generated YAML.
Additionally we have some other options we can modify such as the "minReplicaCount", "maxReplicaCount", "pollingInterval", etc. For demo and testing purposes I have set them really low but in a production like scenario you probably don't want to poll the queue every second :)
apiVersion: keda.sh/v1alpha1
kind: ScaledObject
metadata:
  name: queue-processor-scaledobject
  namespace: default
spec:
  scaleTargetRef:
    name: function-queue-processing # Corresponds with Deployment Name
  triggers:
  - type: azure-queue
    metadata:
      queueName: <QUEUE NAME> # Name of the queue
      connectionFromEnv: STORAGE_CONNECTIONSTRING_ENV_NAME # Coressponds with Connection String at start of yaml
      # Optional
      queueLength: "5" # default 5
  minReplicaCount: 0   # Optional. Default: 0
  maxReplicaCount: 100 # Optional. Default: 100
  pollingInterval: 1  # Optional. Default: 30 seconds
  cooldownPeriod:  10 # Optional. Default: 300 second
  advanced:                                          # Optional. Section to specify advanced options
      restoreToOriginalReplicaCount: true            # Optional. Default: false
      horizontalPodAutoscalerConfig:                   # Optional. Section to specify HPA related options
        behavior:                                      # Optional. Use to modify HPA's scaling behavior
          scaleDown:
            stabilizationWindowSeconds: 300
            policies:
            - type: Percent
              value: 100
              periodSeconds: 15
Having all that configured we can now deploy the YAML file to AKS.
kubectl apply -f .\deploy.yaml
To check if everything is working, check the deployment.
> kubectl get deploy
NAME                        READY   UP-TO-DATE   AVAILABLE   AGE
function-queue-processing   0/0     0            0           20h

> kubectl get ScaledObject
NAME                           SCALETARGETKIND      SCALETARGETNAME             TRIGGERS      AUTHENTICATION   READY   ACTIVE    AGE
queue-processor-scaledobject   apps/v1.Deployment   function-queue-processing   azure-queue                    True    False     20h
Testing the scenario
We now have everything set up! Let's do some testing.
If we look at the Kubernetes deployments, these should start scaling from 0 to n based on the queue size. As long as the queue is larger than 5 it should keep scaling deployments. When the queue is empty it should scale back to zero.

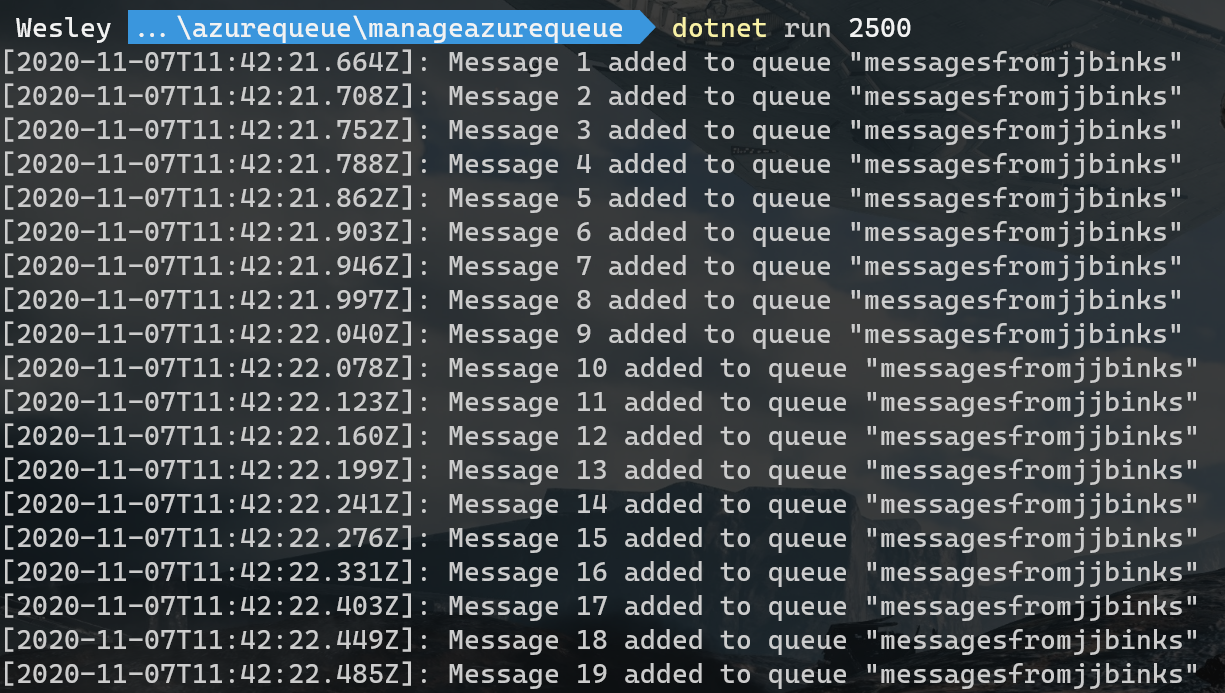
To fill up the queue I'm using some simple code that creates a QueueClient and sends a message of approximately 40KB to the queue. It takes an argument (integer) which will result in X amount of messages in the queue. Code can be found here.
In my example I'm adding 2500 messages to the queue.
Keep in mind that I configured the polling interval and the cool down pretty low, this is for demo purposes and it will scale pretty fast. Tweak the settings for your production scenario accordingly :)
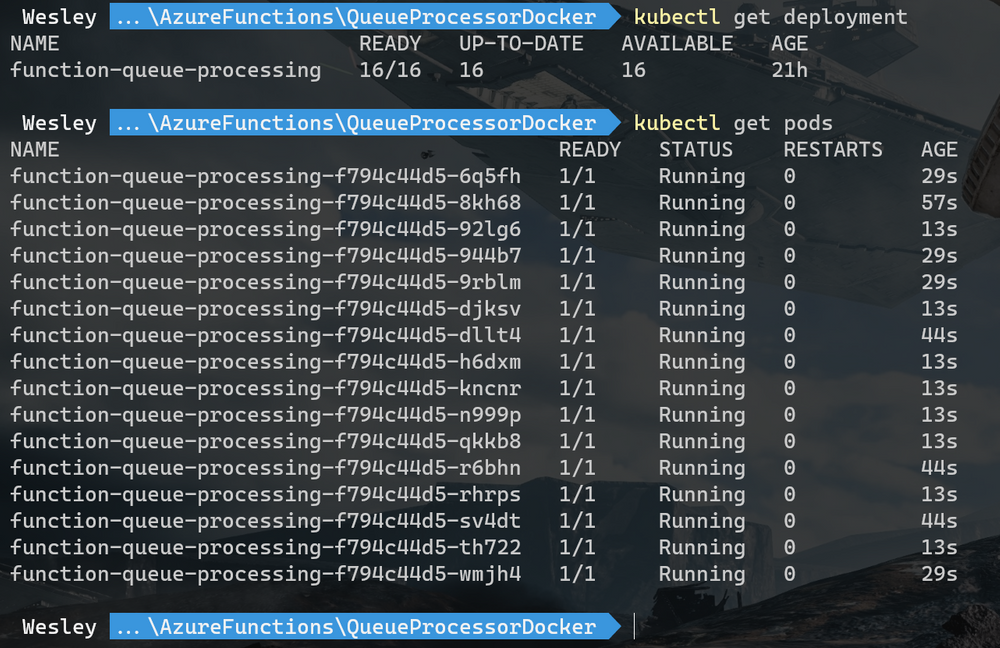
Once the messages start adding we can see that the deployments start scaling and Pods are being added.
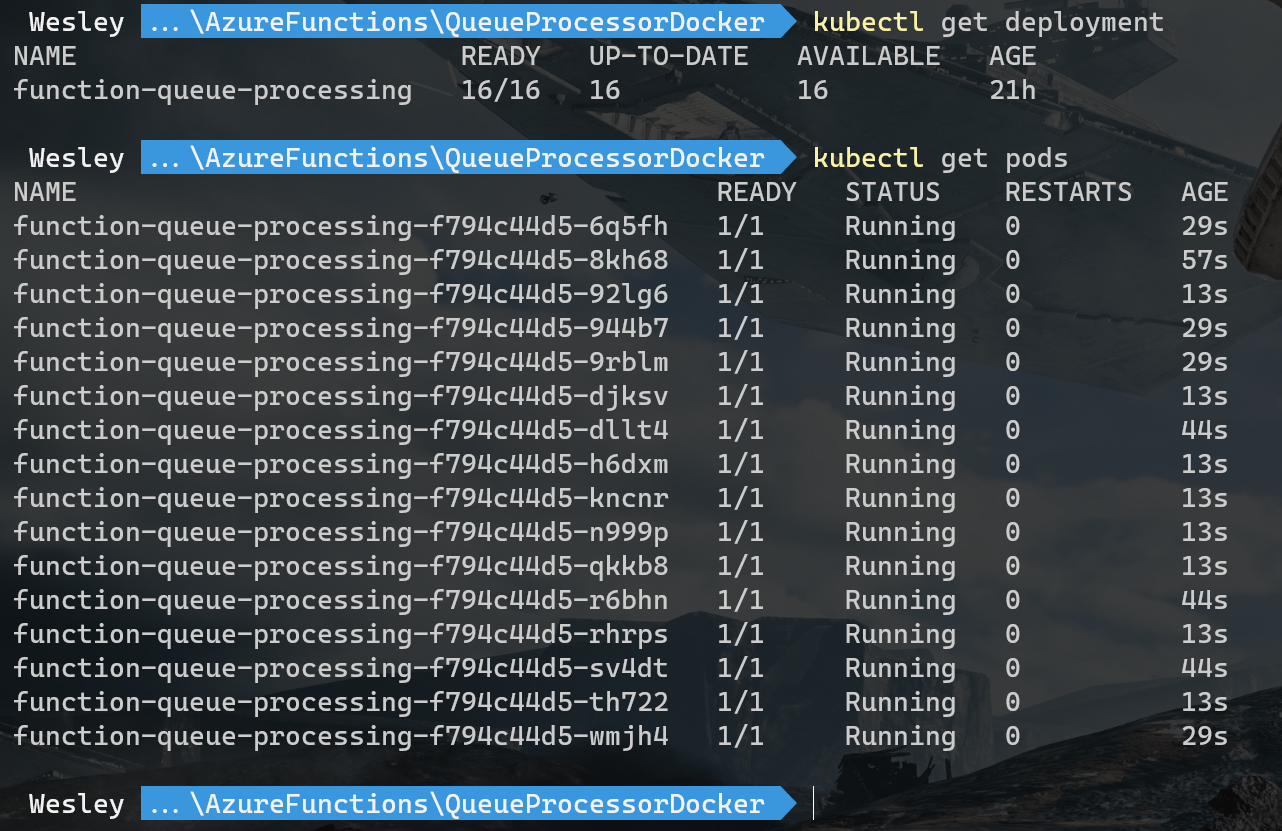
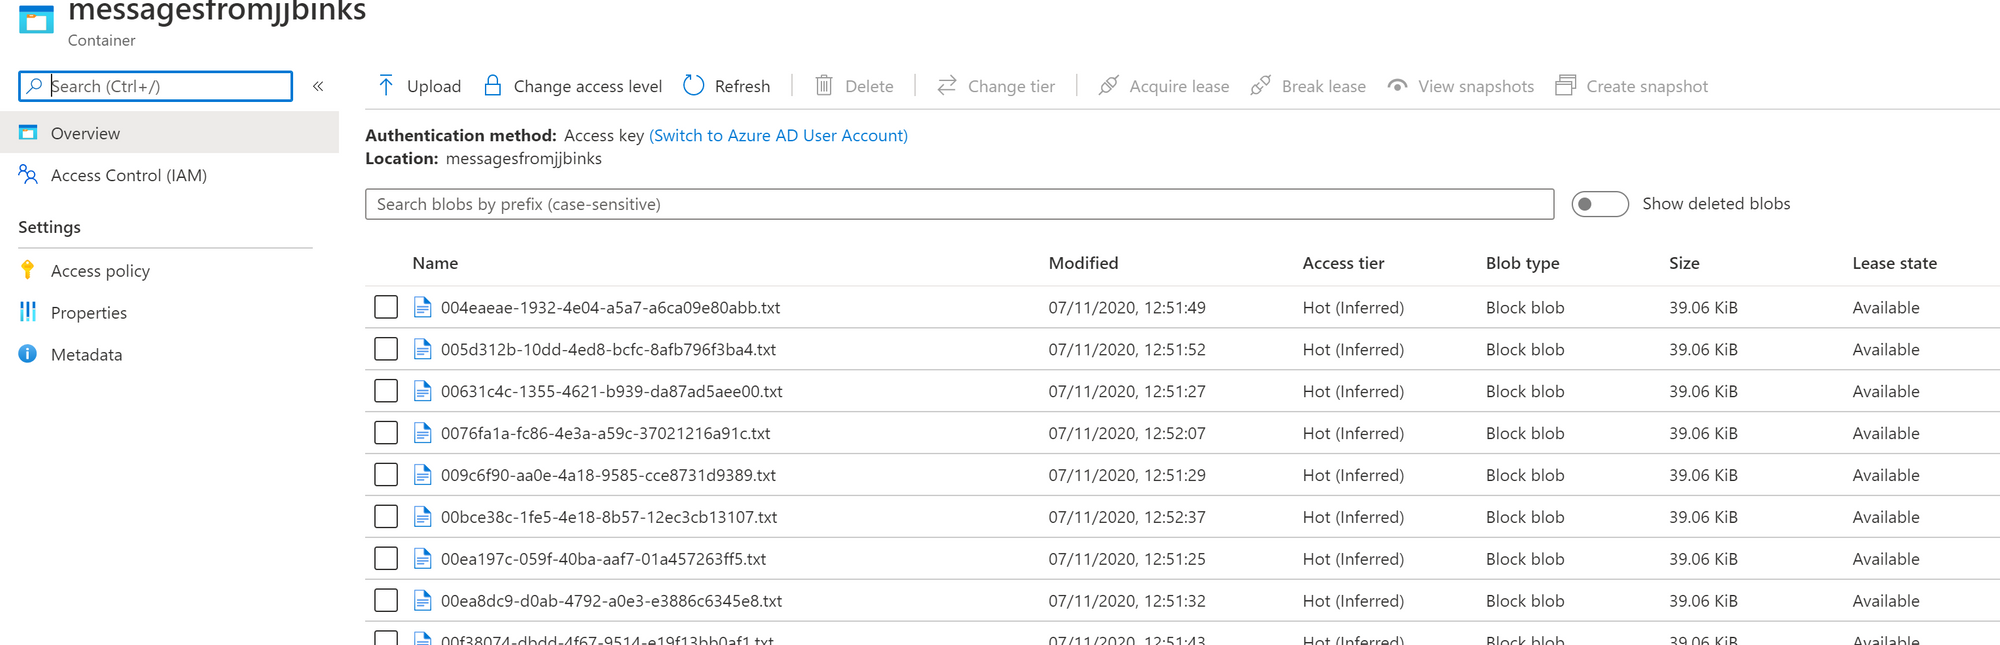
Looks like it scaled! If we take a look at the blob storage we can see that the blob container is created and that messages have been added.
Once everything has been processed the deployment goes back to it's original situation:
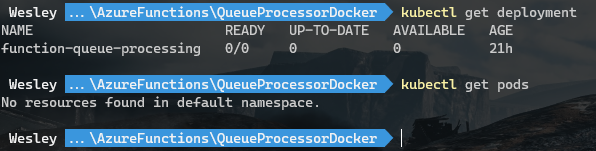
And that's it. We're scaling stuff using KEDA. Keep in mind that for production scenarios you do want to tweak the variables of the ScaledObject to make the behavior less "jumpy".
If you have questions or feedback, let me know!